DIY Holiday Camper (RV)
- Dec 1, 2021
- 2 min read
To ring in the holiday season Xyron is celebrating 12 Holly-Days, find the giveaway link below, thank you for stopping by and checking out my art! Don't forget to visit Xyron.com for 15% off and use the CODE: JAZZY15

A winter camping trip sounds amazing! I bet it’s magical with all the beautiful sceneries and parks. The idea sounds great, so I decided to create something similar at home for the kids. Haha! Let them have their own adventures with pretend play. I rather stay home next to the fireplace. How about you? Outdoor Adventure or stay home?
Here’s what you’ll need,
Materials:
Red & White paint
Xacto knife/scissors
Painters tape
and cardboard
(fabric, wreath, and other decorations)*
Don't forget to enter Xyron's Giveaway by clicking on the link. Dates: December 1-December 15

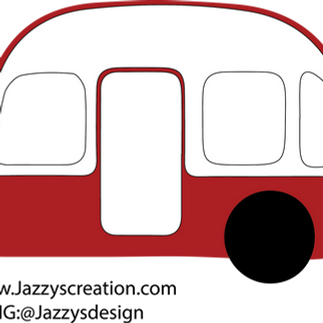
1. Find a clipart or picture of the RV Camper you’ll like to create. I usually just hand-draw my creations but you can easily use a projector or use the clipart below by printing in poster size. You’ll need two of the same flat image for a 3D version. So that means your have 4 overall pieces (front, back and sides)
use the first image to help trace your camper onto the cardboard, remember to go with simple outline, you can always add more details later. Easier to add than remove (or paint over).

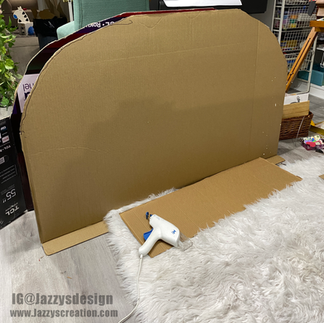


2. Once you have your drawn out pieces on the cardboard, cut it out. I used an xacto knife, but scissors work too [image in the middle]. Front, back, and two sides.
3. I used painter’s tape to hold the cardboard pieces, prior to hot gluing them everything together. I used Xyron’s hot glue because I don’t have to reload the hot glue gun as often. Yes! which means the hot glue gun holds 3 sticks at a time! Perfect for these big projects.
4. Remove the tape to get a clean look with just the hot glue.
5. Then start to paint. Remember it’s cardboard so don’t overload it (don’t add too much paint). Set to dry. Use multiple paint layers if needed.


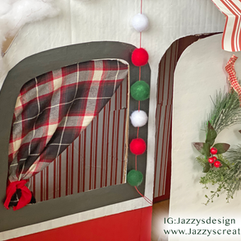
6. As the camper is drying. Time to make and add details. I added a small handmade wreath with xyron pen’s hot glue. I quickly hot glue some fabric curtains inside the camper and added an umbrella top cover over the door.


*If you want to go beyond and add frames around the windows, like I did, I used a thin cardboard that’s a little easier to cutout.
Watch the video for details and more pictures below.


To ring in the holiday season Xyron is celebrating 12 Holly-Days, thank you for stopping by and checking out my art! Don't forget to visit Xyron.com for 15% off and use the CODE: JAZZY15 Giveaway Link: https://gleam.io/TPTJI/xyrons-happy-hollydays-giveaway
Party Supplies are available on my Etsy shop: https://www.etsy.com/shop/JazzysCreation
Visit my website for more: www.jazzyscreation.com
Follow me on Instagram: www.instagram.com/jazzysdesign
Follow me on Facebook: www.facebook.com/jazzyscreationdesign
#happyholiday #Christmas #christmascamper #RVadventures #kidsactivity #momlife #Jazzysdesign #sensoryplay #pretendplay #christmasdecor #cardboardart #xyronhollydays #xyronadhesive #craftwithxyron #xyronstickstogether #xyronsponsored
Find more pictures and Ideas on social media:


Comments